Logic of English publishes great language arts curriculum sets for homeschools, as well as for classroom settings. I recently had the privilege of reviewing Rhythm of Handwriting Complete Set for cursive.
Handwriting is a big topic. Let me just briefly mention that I believe in teaching cursive first and only cursive. Here is a great article about the advantages of cursive first and only.
As I was waiting for my son to mature his fine-motor skills, Rhythm of Handwriting became available to me through the Review Crew. I decided to try it. Perfect timing, as my son seemed to have developed enough to begin and lay the foundation for future copywork.
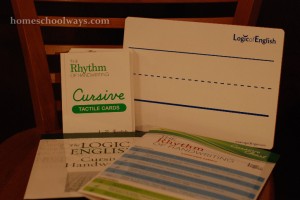
The complete handwriting set costs $65 and contains a student book, a quick reference guide, a set of tactile cards and a small student whiteboard. This curriculum is recommended for ages 4-adult, but, as your child’s teacher, you know if the fine motor skills are in place or not.
The student starts by using large motor skills to form the letters – the tactile cards have sandpaper shapes of each letter and even one card for each individual stroke utilized throughout the curriculum. Then, the student moves to writing on the whiteboard with a dry erase marker. That way, all the mistakes can be easily erased and the process can start all over again on a clean slate.
The whiteboard has two sides, one with a very large area containing the baseline, the midline and the topline for writing. The backside contains several rows of smaller widths, which also facilitate the transition to paper.
If need be, they also recommend the student practice in a sand box or any box with cornmeal or rice.
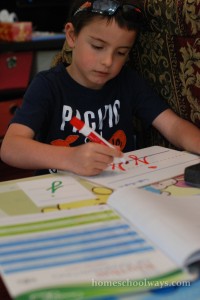
Finally, when you, as the teacher, decide he is ready, he can start using the paper pages in his student book to practice handwriting with fine motor skills.
The paper worksheets contain varying widths and the student can choose whichever they feel best about. My son always preferred the largest (or widest) lines, which are the last two rows on the worksheets.
To recap, here are the steps to get your young student to start penmanship:
1. Sand paper (tactile) cards – as you rehearse the instructions (curve up to the midline etc.)
2. Make the letters in sand, cornmeal, or rice.
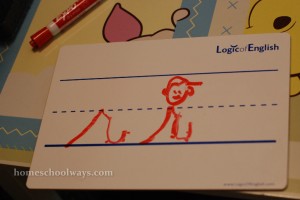
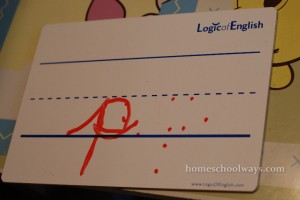
3. Write with a dry erase marker on the large side of the whiteboard.
4. Write on the smaller side of the whiteboard.
5. Move to paper and let your student decide which height he likes the best in the provided worksheets.
6. Work your way through the list of letters.
7. Practice, practice, practice.
The first week for us was easy. It was something new and exciting. The second week was tough. The newness had worn off. His hand would do the required motions in the sand box or on the board, but not on paper. He was frustrated with his own lack of skills. I was wondering if he just was not ready for fine motor skills.
The breakthrough came when I showed him that he was almost done with the “Swing Letters” in ROH. That it’s a category and then we can move on to the next group of letters. He looked at the chart and noticed all the categories. He got excited. Now that he had an idea of what to expect, he seemed motivated to press on. And motivation took care of the skills needed to transition to paper.
What also helped was the weekend – not doing any writing for two days. After the weekend, when we picked it back up, his skills had improved dramatically. It’s as if his brain had needed some time to process. He was not ready to do a whole Practice Sheet in one sitting yet, but he could do four lines without even questioning it. Progress.
The following week, he asked to see the rest of the letters in this first category. I showed him that we would start on Curve Letters that particular week if we kept at it. He was excited at the prospect.
And so, one day later that week, we started Curve Letters. Once he got “a” down, I showed him how “d” is just like an “a” but with a longer “tail.” He got it after a few tries. I was trying to see if we can do two letters a day. Apparently, we could.
That’s when he asked me about writing whole words. Hmm… Really???
I showed him in the book that, at the end of the chapter on Curve Letters, we have practice pages with words. Well, he saw “dad” – the letters he learned today!
He wrote it down once and I was congratulating him so heartily, he took off running. He likes being chased around the house, so I played along. My daughter wanted to be part of the action, so, with her in my arms, I chased my son around the house, running from room to room and laughing all the while.
He loved it. He would sit down to write another “dad” and then he would say, “Now you start chasing me.” I would run and we all laughed and squealed. Whenever I got to him, I showered him with hugs and kisses. He was covering his face, laughing.
This was one of the most fun days in homeschooling my little boy. Breakthroughs are always exciting. And any time we can laugh during school, I’m happy.
The fact remains, after two weeks of cursive instruction, my son wrote his first cursive word.
For the next four weeks, we kept on practicing and almost got to loop letters. I am so glad this curriculum has worked out for us and look forward to using it through the summer, as we don’t want to lose our hard-earned skills.
Here are the social media links for Logic of English:
httpss://www.facebook.com/TheLogicOfEnglish
httpss://www.pinterest.com/logicofenglish/
httpss://www.youtube.com/logicofenglish/
httpss://twitter.com/LogicofEnglish


